Setting Speed
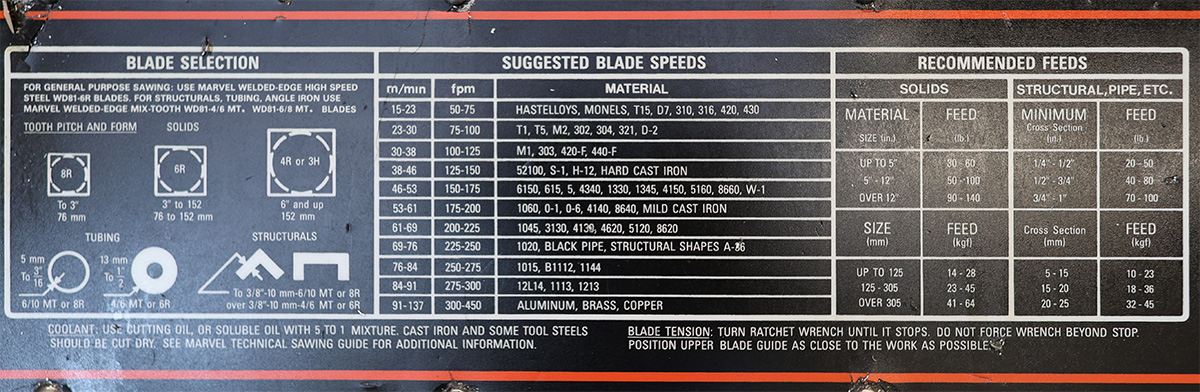
interpret the chart for speed
The saw must be set to the correct RPM for the stock or workpiece material.
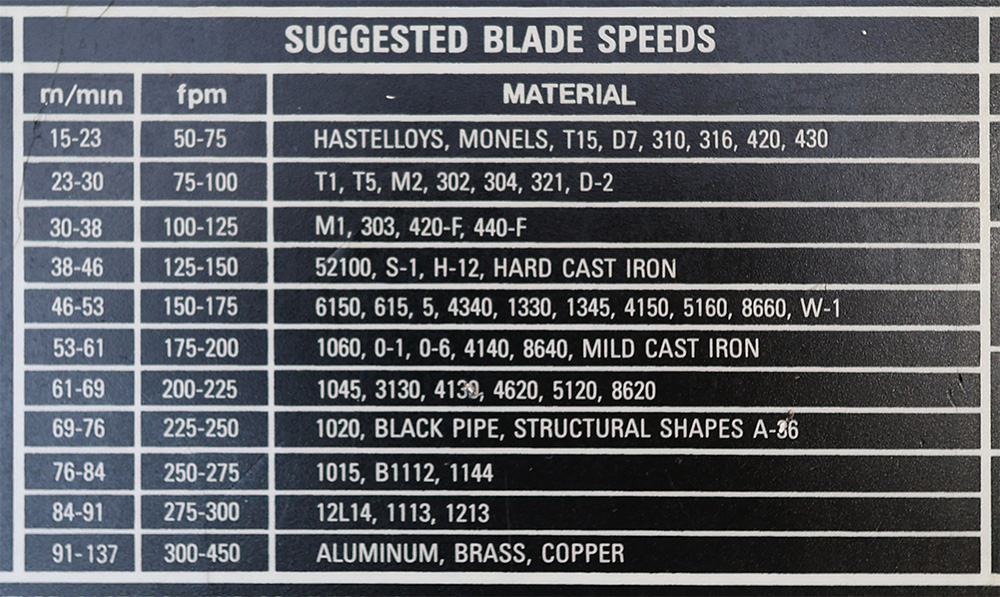
Start with the "MATERIAL" column under "SUGGESTED BLADE SPEEDS".
- A "best-match" is okay.
For example: 1018 steel isn't listed, but 1015 steel is close‑enough. - Read the corresponding speed in the fpm column.
For example: the speed for 1015 steel reads as 250‑275fpm.
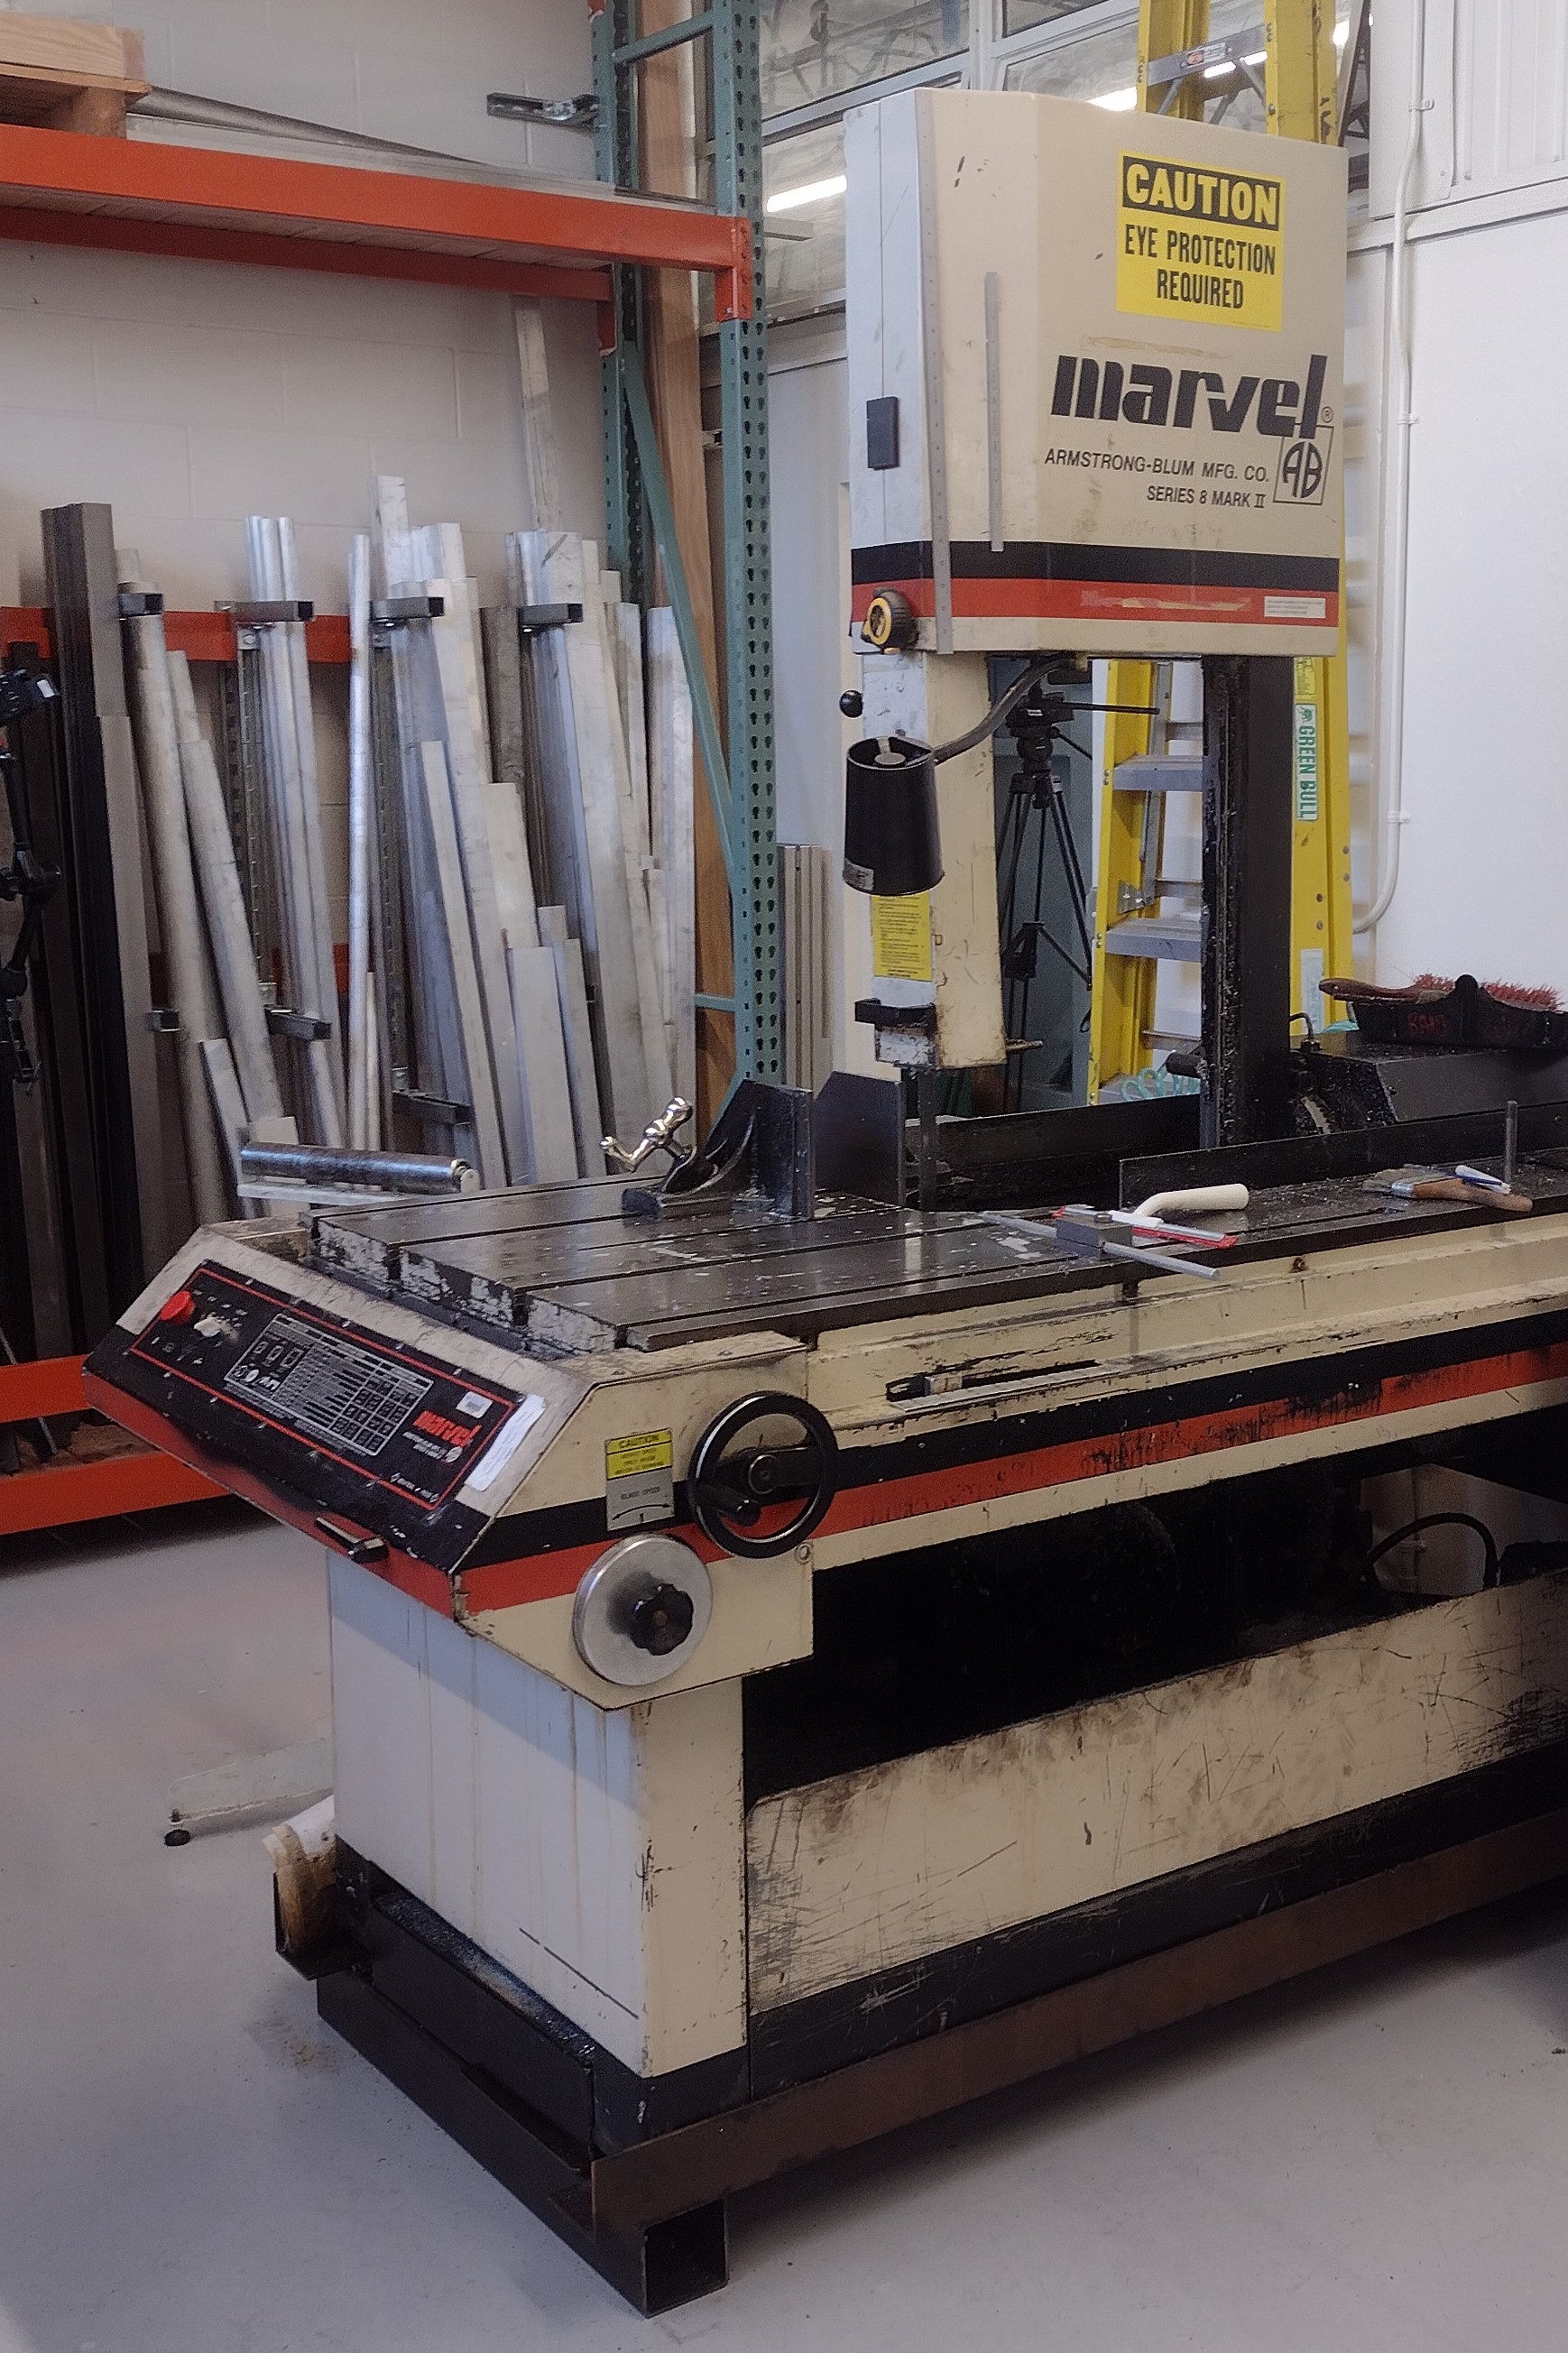
As with most manual machines, the chart on the front of the machine provides the information you need to set feed & speed.
surface speeds for many materials and alloys are listed
start the saw
Similar to the bridgeport mills, the RPM can only be adjusted while the machine is running.
To start the machine, simply press the "start" button.
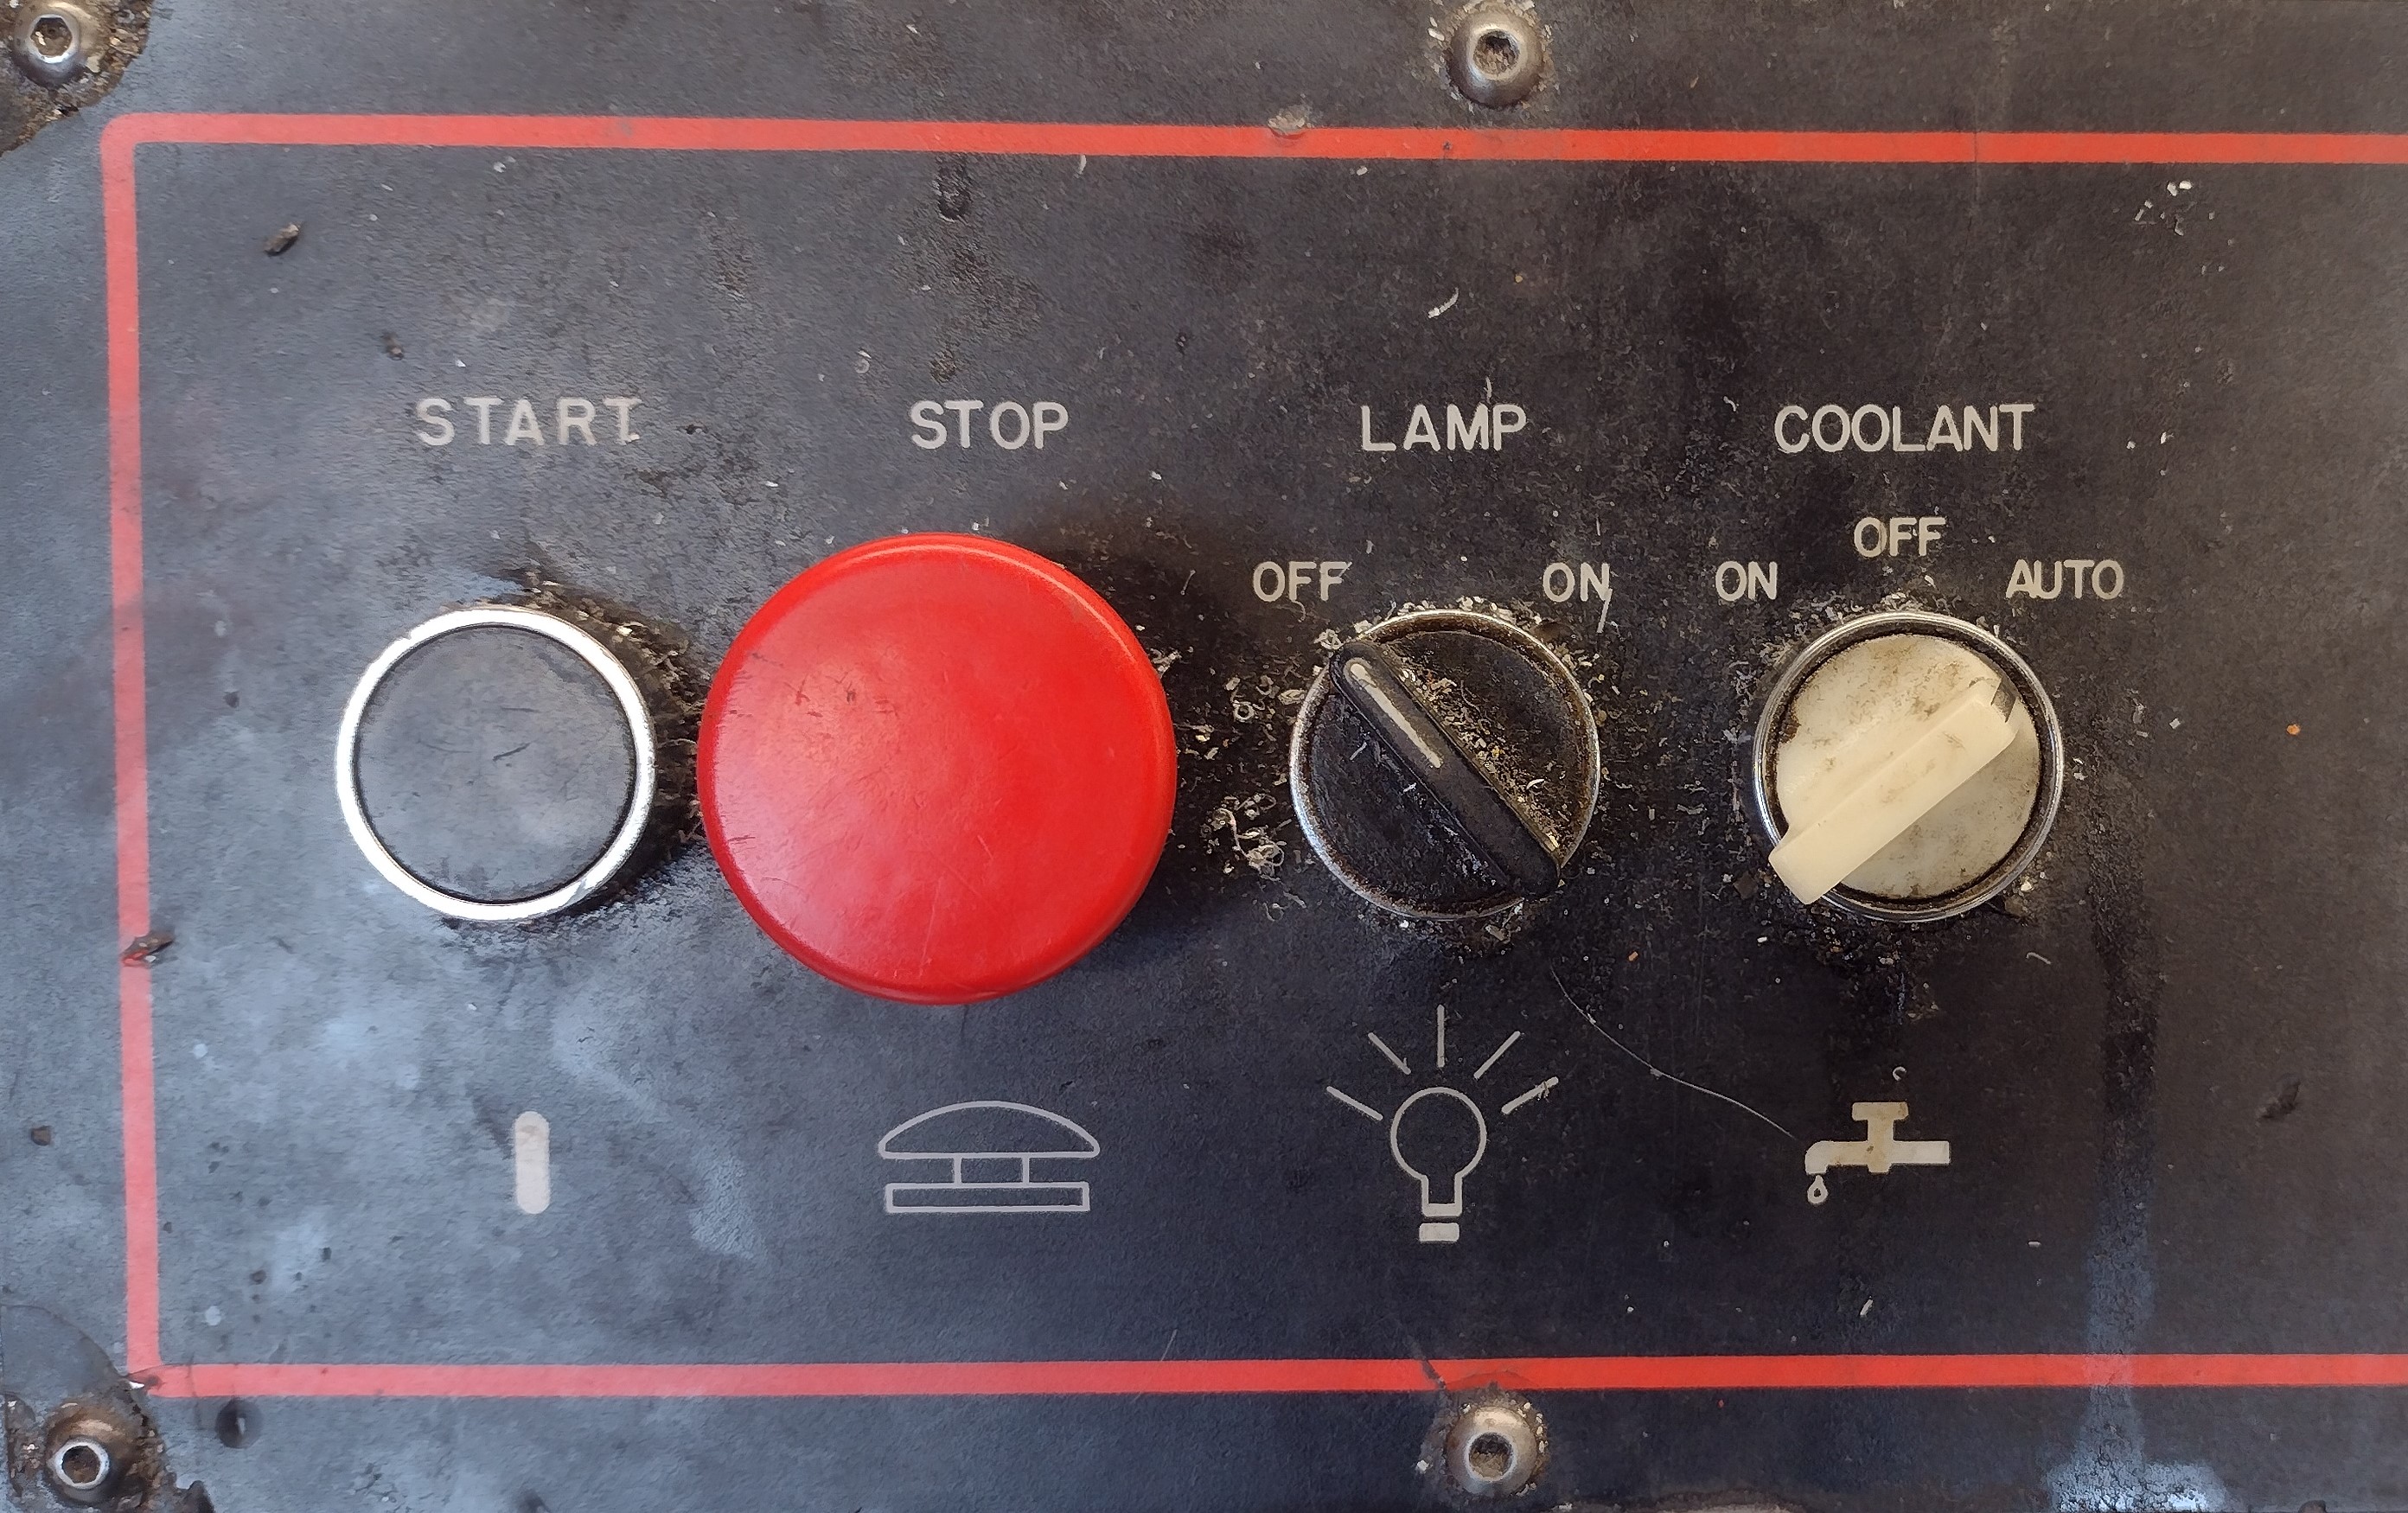
these are the main controls for the saw
starting the saw
set the speed
Now, with the saw running, turn the speed adjust knob to the desired setting.
Setting Feed
Material cross-section & size
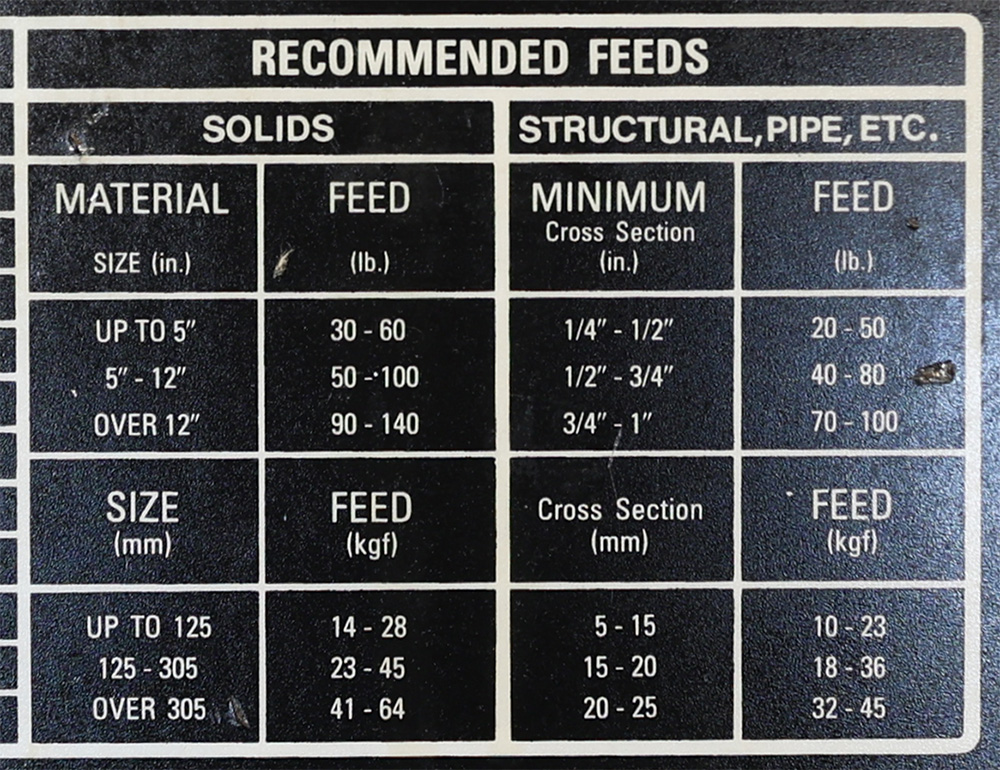
you will almost always set a feed pressure in the 30‑60lbf range
The chart for feeds (listed in pounds-force) is broken down into sections by the material's shape or cross-section.
In general, in the BTC machining program, you will be working with solids, and those solids will be of the smallest size category on the chart, which points to the 30‑60lbf range.
Why a range? What should I set?
A range is given as different materials will cut differently depending on alloy, shapes, heat-treatment, the blade that is installed, and so on. The blade will also perform differently as it wears and adjustments may be necessary. Starting at the middle of the range, and then adjust based on the sound of the cut.
Set the feed
line up the mark on the block with the scale on the frame
Set the feed by sliding the indicator block. The feed may be set or adjusted at any time, regardless of whether the saw is running.
Workholding
Saw Vise
putting the vise together, just for demonstration
The bandsaw vise has a fixed (back) and floating (front) jaw. The lead screw carrier rides inside the floating jaw and ratchets along a rack inside the T-slot. The vise is shown disassembled here only to highlight the partially independent movement of the jaw and carrier.
Opening the Vise
This may take some practice as the forces and motion are fairly unintuitive; don't hesitate to ask for a hands-on demonstration.
- Loosen the clamping screw. This will release material held in the vise.
- To spread the jaws further, grasp the clamping screw handle with one hand and rock the carrier mechanism forward. This will drop the pawl out of engagement with the rack inside the T-slot of the table.
- Place your other hand against the inner face of the jaw and pull it backward, while maintaining the forward tilt of the carrier with your first hand. The floating jaw will drag the carrier back and the vise will open wider.
Closing the Vise - 1
backing out the vise's clamping screw
The vise has very little travel, and if the clamping screw is too far extended when the jaws are slid closed, it might "bottom-out" before it actually clamps. So, start backing the screw all the way out. This will let the carrier move as far forward as possible and ensure the vise has plenty of travel to clamp effectively.
Closing the vise - 2
notice the additional travel of the screw carrier
Slide the jaw toward the saw blade and into contact with your work. The clamping screw carrier will ratchet forward with it.
Then slide the screw carrier as far forward as it will go.
measure stock length
Measure the length of material to cut, from the part-side of the blade to the end of the stock.
Remember to include a small amount of extra stock to remove during machining!
tighten the vise
the blade applies a downward force, pressing the material into the table
Tighten the clamping screw firmly. Use both hands, but don't be excessive. The vise only needs to prevent the material from sliding along its length, while the blade applies a perpendicular force.
double check
Check that the material is actually held securely - if it's not, you want to find out and investigate at this stage.
Making a cut
pre-op check
- Correct RPM set
- Correct feed set
- Correct material length
- Vise tight & material secure
- Blade out‑of‑contact with material
start the saw & wait for coolant
If coolant doesn't start automatically, check the position of the coolant switch.
Start the saw and wait for coolant flow.
begin with hand-feed
Use the hand-feed wheel to bring the blade into gentle contact with the stock and begin the cut. Guiding the start of the cut by hand ensures that the cut-condition will be stable when starting power feed.
notice that that "clockwise" moves the blade forward
hand-feed with moderate pressure until the cut starts and stabilizes
start power feed
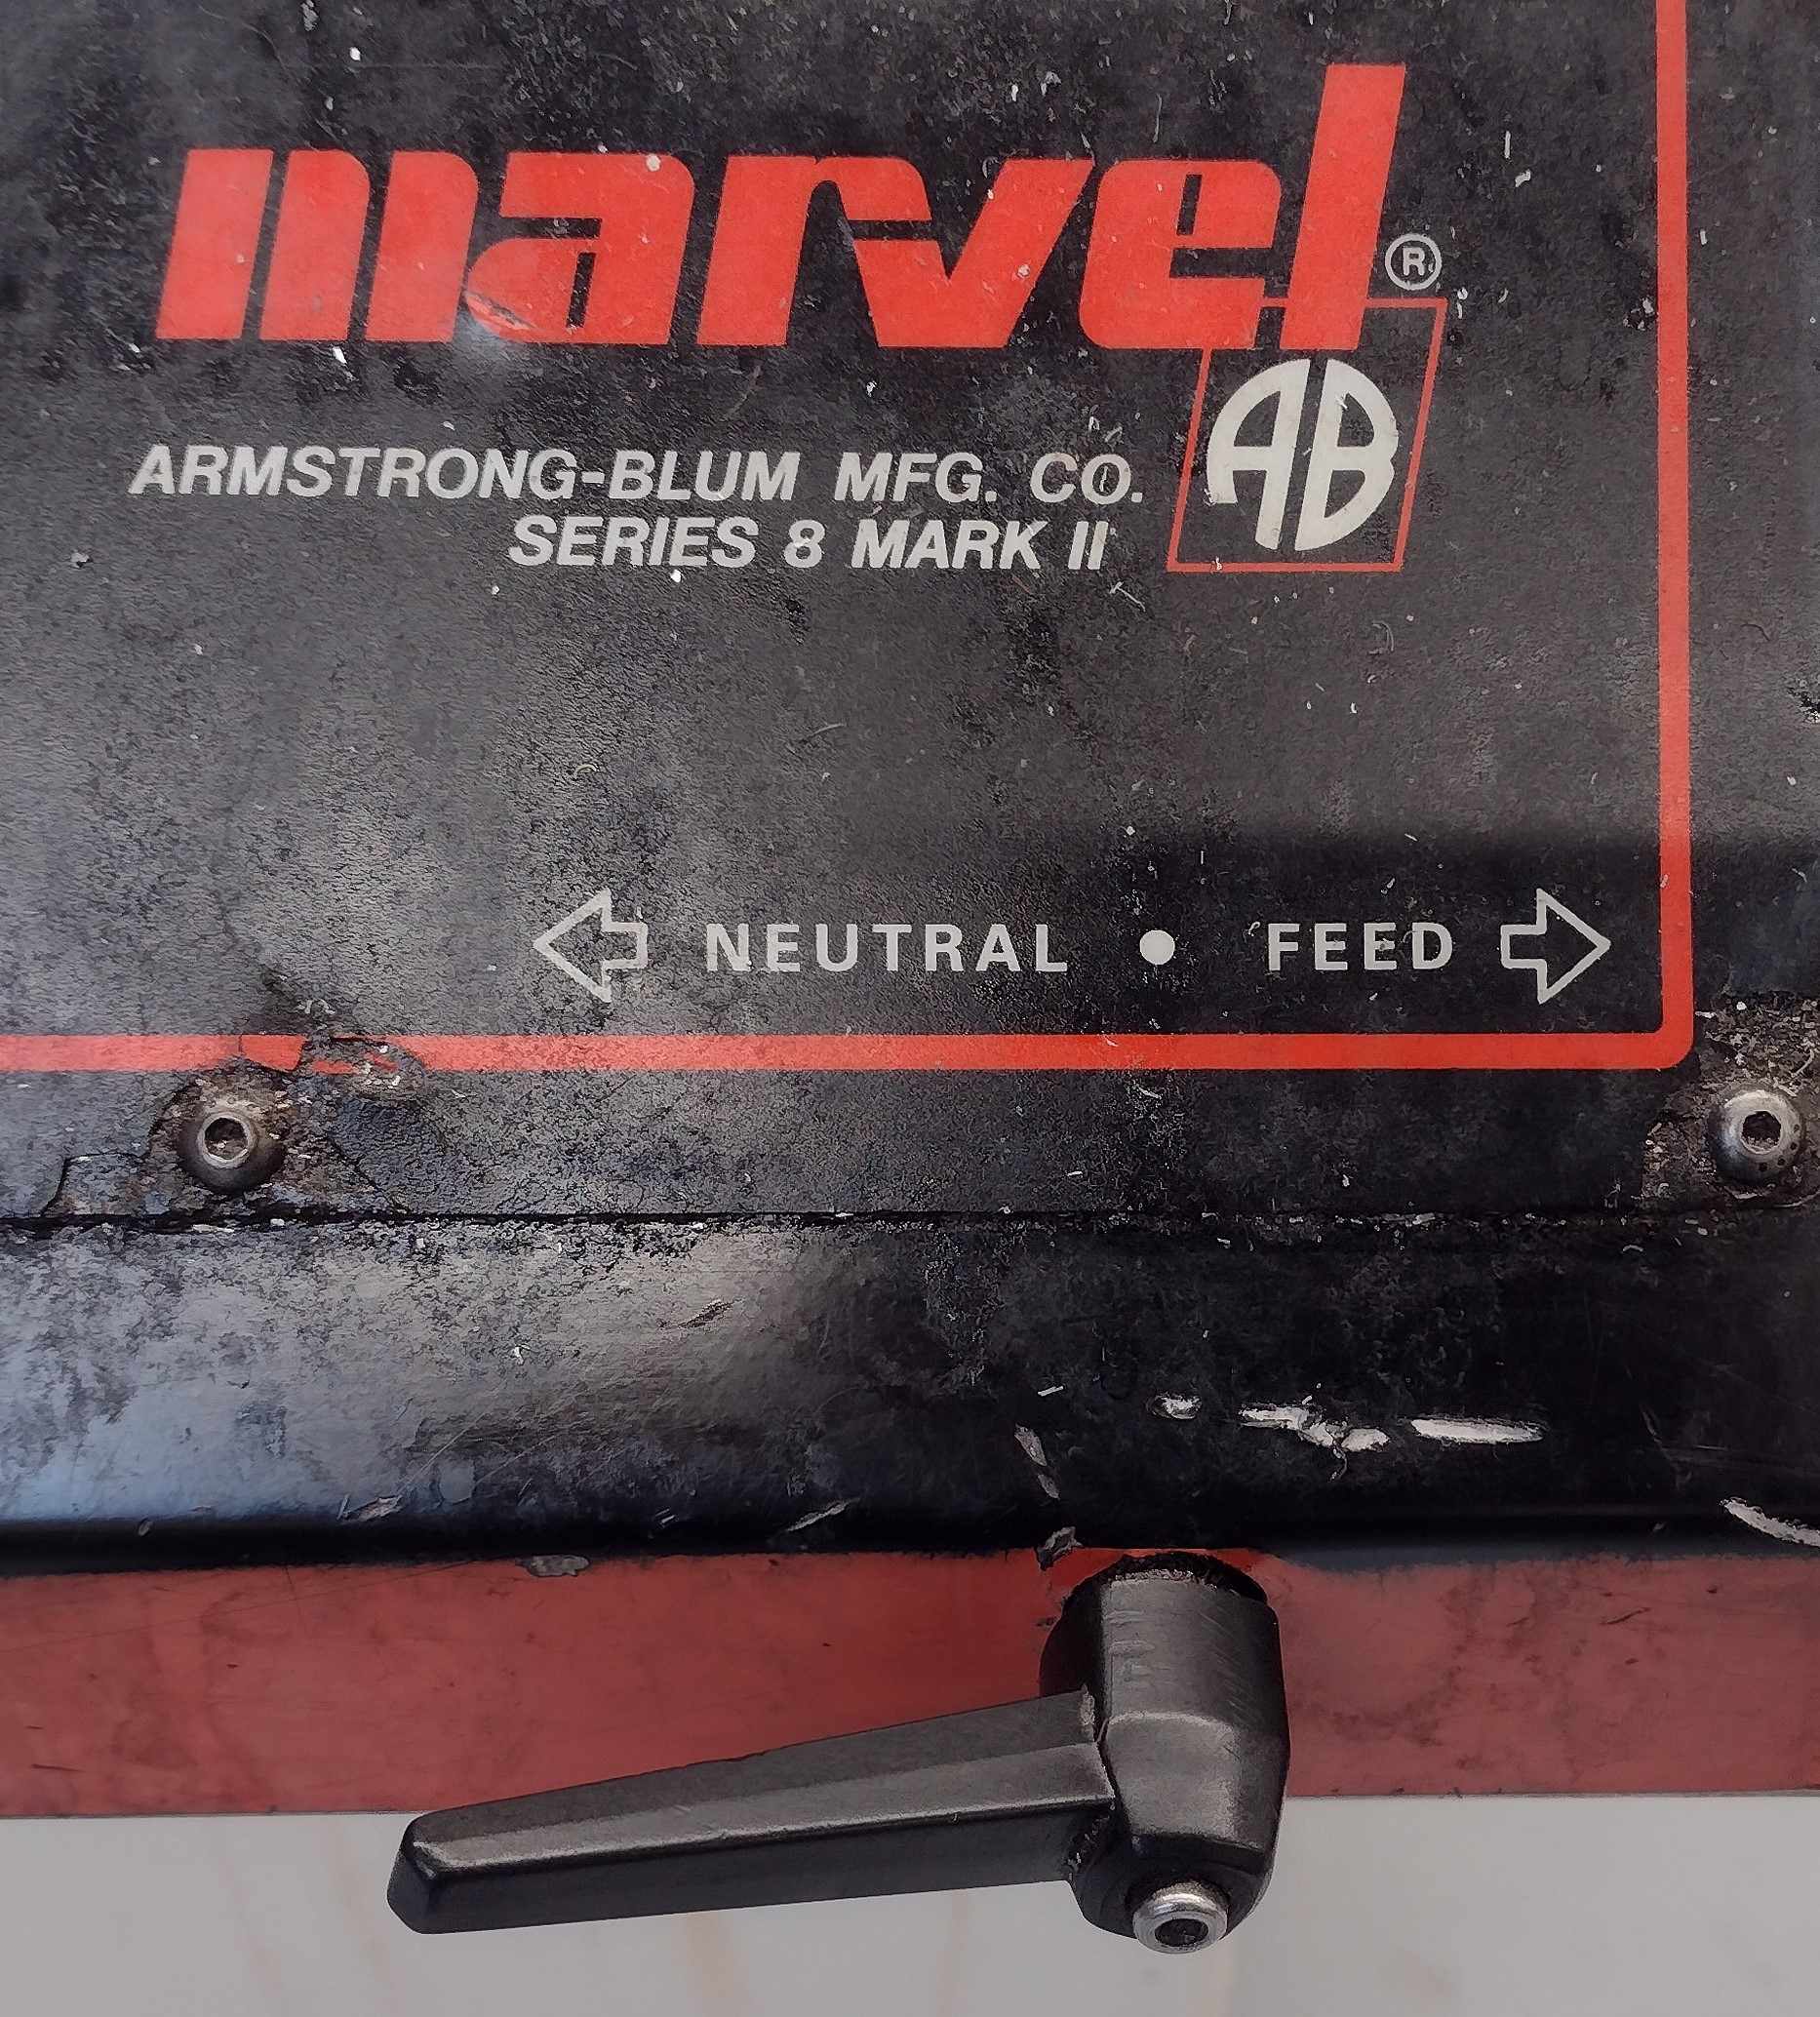
flip clockwise to start power feed
While holding pressure on the handwheel, flip the power feed into gear.
Note on starting power feed
Important:Hold both the handwheel and power feed lever down until it "catches" and starts feeding under power.
This is a good start: the power feed lever stays in gear.
This is a bad start: the power feed lever jumps out of gear.
Watch the cut
Things can go wrong at any time, stick with it and stay off your phone.
Do not leave the saw running unattended.
when the cut completes
When the blade breaks through, completing the cut, reset the power feed to neutral and stop the saw.
reset
Wait for the blade stop, then collect your material.
Handwheel the blade back to the home position.
collect your material before rolling the blade back, or the blade will push your material down into the chip pan
resetting the blade to home readies the saw to cut another piece
clean up
Use the squeegee to remove excess coolant from the bar, then return it to the stock rack or place it in the "shorts" bin.
Squeegee the coolant and chips down into the chip pan, or to the gutter at the front of the saw's table.